Theme images by Storman. Powered by Blogger.

Sunday 13 November 2016

How to create transparent overlay on background image

- No comments
image overlay example
 
        Full-screen image based homepage is the very popular design concept and it is adapted by many websites. Whenever web designer adds the full-screen image on the landing page, a requirement to add text or other contents, over it comes into the picture. But directly adding the text on the image is not a good idea and this makes user experience bad.

This is where adding overlay on the image comes. If you want to add content on the image first create overlay than put content on top of it. Here I gave one example, there is much more use case where you can use an overlay for better user experience.

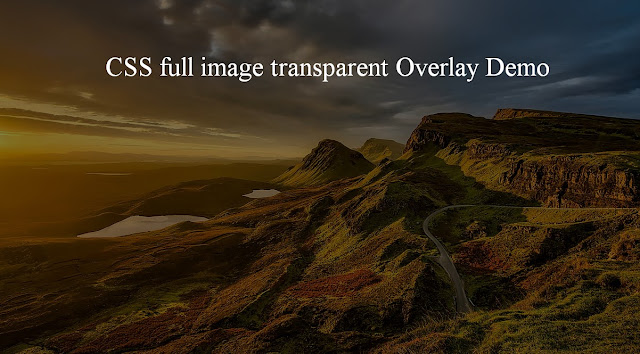
See here what I am talking about View demo

In this post, I am going to share you how you can use CSS to create overlay on the image.

Let’s go step by step

STEP 1: First I am going to create HTML file and basic HTML structure where I will be writing my code.

<!DOCTYPE html>
 <html>
  <head>
         <title>Overlay demo</title>
  </head>
  <body>
   <!-- add your code here -->
  </body>
 </html>

STEP 2: Next I will reset default CSS. So look into given code how you can do same.

body, html {
    margin: 0;
    padding: 0;
    border:0;
    height: 100%;
    font: inherit;
    vertical-align: baseline;
}

STEP 3:  Create an outer div with the background image and make 100% so it can occupy full screen of the browser window.

<div id = "main-img"></div>

#main-img{
 background-image: url("images/back.jpg");
 background-size: cover;
 background-position: center center;
 position: relative;
 height: 100%;
 width: 100%;
 top:0;
 bottom: 0;
}

STEP 4: Create another div inside the outer div and make it position absolute. Add the CSS given below for inner div.

<div id = "main-img">
 <div id = "img-overlay"></div>
</div>

#img-overlay{
 position: absolute;
 height: 100%;
 width: 100%;
 top:0;
 bottom: 0;
 background-color: rgba(0,0,0,0.5);
}


STEP 5: Create content tags as many you want and position them based on your requirement. Here I am using  <div> to add text on the image.

<div id = "main-img">
 <div id = "img-overlay"></div>
 <div class = "img-text">CSS full image transparent Overlay Demo</div>
</div>

.img-text{
    color: white;
    font-size: 50px;
    text-align: center;
    width: 100%;
    position: absolute;
    margin: 100px auto;
}

You can see the demo and get complete code here.
Source Code

Congratulations, you learnt something new. Now it’s time to go and try on your project.

Happy learning :-)

Saturday 29 October 2016

Image preloading using javascript

- No comments


Image preloading is the concept comes in a consideration for websites those are image-heavy or in simple term, having lots of images like photo gallery or image based catalog. For image based catalog when the browser tries to download image sometimes sluggish behavior can occur because of slow connection or low bandwidth.

Image preloading can solve this problem by downloading the images before the viewer has requested them and images will be cached and instantly available when they are needed.Let’s see how you can do Image preloading for your application using javascript.

HOW TO IMPLEMENT PRELOADING :

1) Create array of images or array of objects containing image metadata.
2) Loops through an array or array of objects.
3) Creates a new HTML Image object for each one, and assigns a URL to its src attribute.
4) As soon as each image object is assigned a src value, the browser will fire off a request to the server and cache the image when it is returned.

As per steps given above this will be the code snippet to preload images

for (var i = 0; i<images.length; ++i) {
      var img = new Image();       
      img.src = images[‘url’];
}

Example:

function preload(images) {
    if (document.images) {
        var i = 0;
        var imageArray = new Array();
        imageArray = images.split(',');
        var imageObj = new Image();
        for (i = 0; i < = imageArray.length - 1; i++) {
            imageObj.src = imageArray[i];
        }
    }
}

preload('img1.jpg,img2.jpg,img3.jpg');

Here img1.jpg, img2.jpg and img3.jpg are images which I want to preload . you can replace these with your image file name. You can have as many files as you want.

One drawback of this method is that the browser will try to download as many images as it can at the same time because code will loop through and request every image almost instantly without waiting to hear back from the server.

THE BETTER WAY:

If you understand the behaviour of your viewers this will be very useful. If you know in catalogue user is seeing items sequentially you can load the images in that same sequence. In that case, you only need the one the viewer wants to see right now. With the sequential download, this image has the full bandwidth to itself and will be ready faster than parallel downloading.

Let’s see the steps:

1) Takes the first image in the array (at index 0), attaches an onload handler, and then requests the image.
2) Only after this image has finished loading does it call the onload handler which then does the same thing for the next image. This continues until all images are loaded.

function preload(imageArray, index) {
    index = index || 0;
    if (imageArray && imageArray.length > index) {
        var img = new Image();
        img.onload = function() {
            preload(imageArray, index + 1);
        }
        img.src = images[index][‘url’];
    }
    /* images is an array with image metadata */
    preload(images);

 NOTE : AVOID PRELOADING TOO SOON.

Satisfying image loading requests while it is also downloading critical page elements are not good, the best practice is to start preloading after the whole content is loaded. You can use this code snippet to achieve this.

JQUERY:

<script>
    $(window).load(function() {
        /* Preload code goes here */
    });
</script>

JAVASCRIPT:

<script>
    function load() {
        /* Preload code goes here */
    }
    window.onload = load;
</script>

The result is that all the navigation, thumbnails, and the single main image are loaded as quickly as possible first before we deal with preloading.

Saturday 8 October 2016

Disable cut(CTRL+X), copy(CTRL+C), paste(CTRL+V) and mouse right click in web page

- 2 comments
In this article, I am going to share you how you can disable right-click and cut/copy/paste keyboard option using JavaScript and HTML on your web page.

Before starting anything I am going to give you brief insight about the usage of  disabling right-click and cut/copy option on the web page. So these are few cases.

1. Prevent user to view the source code.
2. Prevent user to copy content.
3. Prevent user to save images or any assets from the web page.

These are the methods you can use to achieve it.

METHOD 1 :  Disable right click and cut, copy, paste using HTML.

Set the oncontextmenu, oncopy, oncut, onpaste to return false in body tag. Your code will be look like this :

<body oncontextmenu = "return false" oncopy="return false" oncut="return false" onpaste="return false">

METHOD 2 :  Disable right click and cut, copy, paste using JavaScript.

To disable right click using JavaScript you can bind function that performs the check for the given input on mouse down Event. Similarly, you can use oncopy, oncut and onpaste event and bind the function to it.
Here is the code snippet :

<script type="text/javascript">

//Disable cut copy paste
document.oncopy = function(){alert("copy option disabled"); return false;}
document.oncut = function(){alert("cut option disabled");return false;}
document.onpaste = function(){alert("paste option disabled");return false;}

//Disable mouse right click
document.onmousedown = disableclick;
msg = "Right Click Disabled";
function disableclick(e)
{
     if(event.button==2)
     {
     alert(msg);
     return false;
   }
}
</script>

METHOD 3 : Disable right click and cut, copy, paste using Jquery.

To do same with  jQuery first you should download jquery file and attach to your html file as given below:
<script src="jquery.min.js"></script>

Next write your Jquery code as given below:

<script type="text/javascript">
$(document).ready(function () {

    //Disable mouse right click
    $("body").on("contextmenu",function(e){
        return false;
    });

    //Disable cut copy paste
    $('body').bind('cut copy paste', function (e) {
        e.preventDefault();
    });

});
</script>

Disabling right-click and cut/copy/paste option will not give you the guarantee to secure your data from any action but it will make things difficult for the novice.


Sunday 2 October 2016

Create Loading icon using CSS

- No comments
      "Loading icon" or "Loader" are frequently used in web applications to show, the complex process is running behind the screen. Mostly, GIF images are used to create loader but they can be heavy and take the time to load in the browser.So one of the best alternative  to avoid heavy GIF is using CSS to create loader.

 In this post, I  will show you  how to create the loader for your application using CSS. Let us start step by step

STEP 1: Add loader div inside <body> tag
       
            <!DOCTYPE html>
            <html>
                     <head></head>
                    <body>
                                  <div class="loader"></div>
                                 <div class = "loadText">Loading..</div>
                    </body>
           </html>

STEP 2: Add given CSS inside <style> tag or in CSS file where you are managing your CSS.

.loader {
  margin: 50px;
  border: 5px solid #ebeef0;
  border-radius: 50%;
  border-top: 5px solid #0BDAA1;
  width: 100px;
  height: 100px;
  -webkit-animation: spin 1s linear infinite;
  animation: spin 1s linear infinite;
}

@-webkit-keyframes spin {
  0% { -webkit-transform: rotate(0deg); }
  100% { -webkit-transform: rotate(360deg); }
}

@keyframes spin {
  0% { transform: rotate(0deg); }
  100% { transform: rotate(360deg); }
}

.loadText{
  font-size: 20px;
  margin-left: 70px;
  color: blue;
}

STEP 3: Save and load this in browser
       
Here is the output you will get into your browser.

Now understand what CSS is doing in this code.

Circle for loader is created using "border-radius : 50%"  and Green color loading part is created using "border-top: 5px solid #0BDAA1;" where 5px is border size.remaining loading part is created using  "border: 5px solid #ebeef0;" .

Next is animation, which is responsible for spinning the loader with 1-second animation speed for forever and  "@keyframes spin" defines the rule for the loader.

To experiment with the loader you can give border-left,border-right, border-bottom and border-top altogether or with any combination.

Click here to see working example.
View Demo

I hope you learned something and enjoyed the post.


Thursday 29 September 2016

Setup a simple server using Python

- No comments
Today I will share you how to setup server quickly using Python in Windows in 5 easy steps.

Step 1 : Download python

Go to Python's official site and select the suitable version for your system and download.
Here is the link to download : https://www.python.org/downloads/

          
Step 2 : Install it

To install Python go to download location on your computer, double click the file and press Run when pop-up appears.

If you have multiple accounts on your computer and you don’t want to install it for all, select the “Install just for me” option then press "Next". move forward and finish the installation process.

Step 3 : Add Python to System Path Variable

Go to control panel then “Edit the system environment variables". when “System Properties” window appears, click on “Environment Variables…” and click on "New.." which appears in the bottom.


Give Variable name as "Path" and Variable value  as "c:\python27;c:\python27\script" . Variable value depends on where you Python script folder resides.


Step 4 : Run server

Go to your project directory and run given command.

#  for Python 2
python -m SimpleHTTPServer <portNo>

# for Python 3
python -m http.server <portNo>
or
python -m http.server

ex.
python -m http.server

For example, I run Python3.3 and the command I use is python -m http.server


Step 5 : Run URL in browser

 At last, go to your favorite browser.
 Paste the given URL in address bar  " http://localhost:8000/index.html "  and enter now, you can debug  your application in browser.


Wednesday 28 September 2016

Event bubbling and capturing in JavaScript

- No comments


 In the HTML DOM API event bubbling and capturing are two ways to determine event propagation or which element is going to receive handler first for given event.

       when an event occurs in an child element and both(parent and child) elements are register a handler for that event. The event propagation mode determines in which order the elements receive the event.

Bubbling:

The event is first captured and handled by the child element and then propagated to parent elements.

Example:

<!DOCTYPE HTML>
<html>
<body>
<div class="div1"> block 1  
    <div class="div2">block 2
        <div class="div3">block 3</div>
    </div>
</div>
</body>
</html>

From above given code click on div3 will trigger event  first on the child element 3 , then on the element 2, and the last will be element 1.

Capturing:

The event is first captured by the parent element and propagated to the child elements.

Example :

<!DOCTYPE HTML>
<html>
<body>
<div class="div1">block 1
    <div class="div2">block 2
        <div class="div3">block 3</div>
    </div>
</div>
</body>
</html>

From above given code click on div will trigger event  first on the parent element 1 , then on the element 2, and the last will be element 3.

Enable event capturing on element :

element.addEventListener("click", doSomething, useCapture);

useCapture = true
The handler is set for the capturing .
useCapture = false
The handler is set for the bubbling.

Example :

<!DOCTYPE HTML>
<html>
<body>
<div id="div1"> block 1  
    <div id="div2">block 2
        <div id="div3">block 3</div>
    </div>
</div>
</body>
</html>

var element = document.querySelector("#div3");

// set capturing
element.addEventListener("click", doneClick, true);

// set bubbling
element.addEventListener("click", doneClick, false);

Stop event capturing/bubbling :

W3C standard:
event.stopPropagation()

IE:
event.cancelBubble=true

Example:

function doneClick(e) {
    e.stopPropagation();
}

Trick to remember the propagation order:

Trickle(capture) down, bubble up

Note:
  • There are events which don’t bubble, but can be captured. For      example, onfocus/onblur.
  • In IE<9 Events are only bubble.