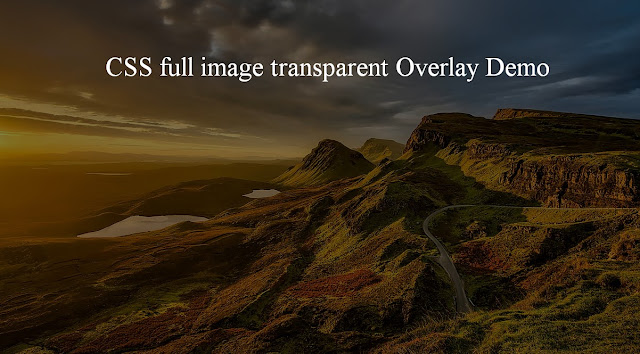
Full-screen image based homepage is the very popular design concept and it is adapted by many websites. Whenever web designer adds the full-screen image on the landing page, a requirement to add text or other contents, over it comes into the picture. But directly adding the text on the image is not a good idea and this makes user experience bad.
This is where adding overlay on the image comes. If you want to add content on the image first create overlay than put content on top of it. Here I gave one example, there is much more use case where you can use an overlay for better user experience.
See here what I am talking about View demo
In this post, I am going to share you how you can use CSS to create overlay on the image.
Let’s go step by step
STEP 1: First I am going to create HTML file and basic HTML structure where I will be writing my code.
<!DOCTYPE html>
 <html>
  <head>
         <title>Overlay demo</title>
  </head>
  <body>
   <!-- add your code here -->
  </body>
 </html>
STEP 2: Next I will reset default CSS. So look into given code how you can do same.
body, html {
    margin: 0;
    padding: 0;
    border:0;
    height: 100%;
    font: inherit;
    vertical-align: baseline;
}
STEP 3: Create an outer div with the background image and make 100% so it can occupy full screen of the browser window.
<div id = "main-img"></div>
#main-img{
 background-image: url("images/back.jpg");
 background-size: cover;
 background-position: center center;
 position: relative;
 height: 100%;
 width: 100%;
 top:0;
 bottom: 0;
}
STEP 4: Create another div inside the outer div and make it position absolute. Add the CSS given below for inner div.
<div id = "main-img">
 <div id = "img-overlay"></div>
</div>
#img-overlay{
 position: absolute;
 height: 100%;
 width: 100%;
 top:0;
 bottom: 0;
 background-color: rgba(0,0,0,0.5);
}
STEP 5: Create content tags as many you want and position them based on your requirement. Here I am using <div> to add text on the image.
<div id = "main-img">
 <div id = "img-overlay"></div>
 <div class = "img-text">CSS full image transparent Overlay Demo</div>
</div>
.img-text{
    color: white;
    font-size: 50px;
    text-align: center;
    width: 100%;
    position: absolute;
    margin: 100px auto;
}
You can see the demo and get complete code here.
Source Code
Congratulations, you learnt something new. Now it’s time to go and try on your project.
Happy learning :-)


