Theme images by Storman. Powered by Blogger.

Monday, 11 February 2019

Find the min/max element of an Array in JavaScript

- No comments

I have just figured out some great way to find the min and max value from the array and I just wanted to share with all of you.

See the code below, use it or add console log to understand it in depth.


var arr = [12, 89, 67, 55];

// Method 1
function arrayMax(arr) {
return arr.reduce(function(p, v) {
return Math.max(p, v); // Math.min for min
});
}
arrayMax(arr);

// Method 2
function arrayMax(arr) {
return arr.reduce(function(p, v) {
return p > v ? p : v; // p < v for min
});
}
arrayMax(arr);

// Method 3
Math.max(...arr); // Math.min for min

// Method 4
function findMinMax(arr) {
let min = arr[0],
max = arr[0];

for (let i = 1, len = arr.length; i < len; i++) {
let v = arr[i];
min = v < min ? v : min;
max = v > max ? v : max;
}
return [min, max];
}

findMinMax(arr);

Thursday, 7 February 2019

Bootstrap Custom Theme in react Application

- 1 comment


"Bootstrap" as every developer knows a very popular framework for the CSS and, comes with its build in components, styles and utilities.

Recently I was using bootstrap for one of my react project. but bootstrap comes with its own default styles and I was looking for some mechanism so I can use my own styles or putting into the simple way I can customize the bootstrap styles.

During this process, I figured out the solution, In this post, In a few easy steps I am going to share how you can customize bootstrap.

STEP 1:

Include bootstrap in your application
           

  npm install --save bootstrap


STEP 2:

To customize Bootstrap, create a file called src/custom.scss(decide the place where you want to keep your custom.scss file) and alter the value of the variable you want to customize.


// Override default variables before the import
$primary: #000;

// Import Bootstrap and its default variables
@import '~bootstrap/scss/bootstrap.scss';


You can see all the available variables inside bootstrap\scss\_variables.scss and you can select the one which you want to modify.


STEP 3 :

Import the newly created .scss file instead of the default Bootstrap .css in the beginning of your src/index.js file, for example:


import './customCss/custom.scss';


And its done. Run your react project and see the magic.


Thanks for reading; if you find it useful or something you want to add do comment.

Happy Learning :-)


Wednesday, 12 December 2018

Unit Testing in gatsby using Jest

- No comments

Jest is basically a unit testing framework which is frequently used in React but
in this post I want to share how you can use jest in gatsby for unit testing. gatsby is the static site generator using this you can create websites in react.

1. Installing dependencies

First you need to install Jest and some more required packages. You need to install Babel 7 as it’s required by Jest.


npm install --save-dev jest babel-jest react-test-renderer identity-obj-proxy babel-core@^7.0.0-bridge.0 @babel/core babel-preset-gatsby


2. Creating a configuration file for Jest
Add this in root folder

jest.config.js


module.exports = {
"transform": {
"^.+\\.jsx?$": "<rootDir>/jest-preprocess.js"
},
"moduleNameMapper": {
".+\\.(css|styl|less|sass|scss)$": "identity-obj-proxy",
".+\\.(jpg|jpeg|png|gif|eot|otf|webp|svg|ttf|woff|woff2|mp4|webm|wav|mp3|m4a|aac|oga)$": "<rootDir>/__mocks__/fileMock.js"
},
"testPathIgnorePatterns": ["node_modules", ".cache"],
"transformIgnorePatterns": ["node_modules/(?!(gatsby)/)"],
"globals": {
"__PATH_PREFIX__": ""
},
"testURL": "http://localhost",
"setupFiles": ["<rootDir>/loadershim.js"]
}


jest-preprocess.js


const babelOptions = {
presets: ["babel-preset-gatsby"],
}
module.exports = require("babel-jest").createTransformer(babelOptions)


__mocks__/fileMock.js

module.exports = "test-file-stub"


loadershim.js

global.___loader = {
enqueue: jest.fn(),
}

3. Useful mocks to complete your testing environment


Mocking Gatsby

Finally it’s a good idea to mock the gatsby module itself. This may not be needed at first, but will make things a lot easier if you want to test components that use Link or GraphQL.

This mocks the graphql() function, Link component, and StaticQuery component.

__mocks__/gatsby.js


const React = require("react")
const gatsby = jest.requireActual("gatsby")

module.exports = {
...gatsby,
graphql: jest.fn(),
Link: jest.fn().mockImplementation(({ to, ...rest }) =>
React.createElement("a", {
...rest,
href: to,
})
),
StaticQuery: jest.fn(),
}

4.Writing tests

Put test inside test folder with the extension .spec.js or .test.js. 

a) Snapshot test :-

Testing simple page

-- src/pages/samplePage.js

import React from 'react'

const SamplePage = () => (
<div>
<h1>renders correctly</h1>
</div>
)

export default SamplePage


-- test/dummyTest.test.js


import React from "react"
import renderer from "react-test-renderer"
import Bio from "./Bio"

describe("Bio", () => {
it("renders correctly", () => {
const tree = renderer.create(<Bio />).toJSON()
expect(tree).toMatchSnapshot()
})
})


Testing page  wrapped inside component / shallow rendering test 

-- src/pages/page-2.js


import React from 'react'
import { Link } from 'gatsby'

import Layout from '../components/layout'
import SEO from '../components/seo'

const SecondPage = () => (
<Layout>
<SEO title="Page two" />
<h1>Hi from the second page</h1>
<p>Welcome to page 2</p>
<Link to="/">Go back to the homepage</Link>
</Layout>
)

export default SecondPage


-- test/dummyTest.test.js

import React from "react"
import ShallowRenderer from 'react-test-renderer/shallow'
import SecondPage from "../src/pages/page-2"

describe("Test second page render", () => {
it("renders correctly", () => {
const renderer = new ShallowRenderer()
const tree = renderer.render(<SecondPage />)
expect(tree).toMatchSnapshot()
})
})


Running tests


Add jest for the test in package.json file

"scripts": {
"build": "gatsby build",
"develop": "gatsby develop",
"start": "npm run develop",
"format": "prettier --write \"src/**/*.js\"",
"test": "jest"
},


If you want you could also add a script that runs jest --watchAll to watch files and run tests when they are changed.


you can now run tests by typing npm run test


If you make changes that mean you need to update the snapshot, you can do this by running npm run test -- -u.

jest --coverage config can be used to see the whole coverage report.


Find more details here :  https://www.gatsbyjs.org/docs/unit-testing/


Happy Learning :-)


Sunday, 25 June 2017

Self Development : Cockroach Theory- A beautiful speech by Sundar Pichai.

- No comments
In this post I am going to share A beautiful speech given by Sundar Pichai for self development. I want you to read this story and watch the video. This will help you to change your perspective to think about situations and events happening in life.


At a restaurant, a cockroach suddenly flew from somewhere and sat on a lady. She started screaming out of fear. With a panic stricken face and trembling voice, she started jumping, with both her hands desperately trying to get rid of the cockroach. 

Her reaction was contagious, as everyone in her group also got panicky. The lady finally managed to push the cockroach away but …it landed on another lady in the group. Now, it was the turn of the other lady in the group to continue the drama. 

The waiter rushed forward to their rescue. In the relay of throwing, the cockroach next fell upon the waiter.
The waiter stood firm, composed himself and observed the behavior of the cockroach on his shirt.
When he was confident enough, he grabbed it with his fingers and threw it out of the restaurant.

Sipping my coffee and watching the amusement, the antenna of my mind picked up a few thoughts and started wondering, was the cockroach responsible for their histrionic behavior?
If so, then why was the waiter not disturbed? He handled it near to perfection, without any chaos.
It is not the cockroach, but the inability of the ladies to handle the disturbance caused by the cockroach that disturbed the ladies. 

I realized that, it is not the shouting of my father or my boss or my wife that disturbs me, but it’s my inability to handle the disturbances caused by their shouting that disturbs me. It’s not the traffic jams on the road that disturbs me, but my inability to handle the disturbance caused by the traffic jam that disturbs me. 

More than the problem, it’s my reaction to the problem that creates chaos in my life.

Lessons learnt from the story: “Do not react in life. Always respond.“

The women reacted, whereas the waiter responded. 

Reactions are always instinctive whereas responses are always well thought of, just and right to save a situation from going out of hands, to avoid cracks in relationship, to avoid taking decisions in anger, anxiety, stress or hurry.

Happy Reading  :-)

Most inspirational speech by steve jobs

- No comments
In this post I am going to share Most inspirational speech given by steve jobs.

Steve Jobs was an American entrepreneur, businessman, inventor, and industrial designer. He was the co-founder, chairman, and chief executive officer (CEO) of Apple Inc.CEO and majority shareholder of Pixar, a member of The Walt Disney  Company's board of directors following its acquisition of Pixar, and founder, chairman, and CEO of NeXT. Jobs and Apple co-founder Steve Wozniak are widely recognized as pioneers of the microcomputer revolution of the 1970s and 1980s.(Source : wikipedia)


Read complete speech here : http://news.stanford.edu/2005/06/14/jobs-061505/


These quotes will help you to keep moving.

- No comments


Your whole life can never depend on one single event. Life always have more to offer than you think it would.

Life is like riding a bicycle. To keep your balance you must keep moving.

You can not stop a bird from landing on your head, but you can keep it away from building a nest.

Don't Take Anything Personally. Nothing others do is because of you. What others say and do is a projection of their own reality, their own dream. When you are immune to the opinions and actions of others, you won't be the victim of needless suffering. ~ Don Miguel Ruiz

You can spend minutes, hours, days, weeks, or even months over-analyzing a situation; trying to put the pieces together, justifying what could’ve, would’ve happened… or you can just leave the pieces on the floor and move on.

You will be thrown down again and again, will fail countless times, and you will be beaten to the point where every doubt and fear will creep up to fight you. But you have to just keep going.

Don't be afraid to shake the apple tree a bit to see what fruits remain after.


These quotes will help you to create your better version.

- No comments


Don't be worst company of yourself 

Whenever you find yourself wasting time, remember. There is someone out there who is equipping him/her at this very moment. The day you compete with him, you’ll lose.

Your problem is you have spent your whole life thinking there are rules. There aren’t. We used to be gorillas. All we had is what we could take and defend.

If you spend too much time thinking about a thing, you’ll never get it done. ~ Bruce Lee

Life can be hard. But remember, while the difficult moments may decrease happiness, they’re essential for building meaning. And that’s what matters in the long run."

You don't get frustrated because of events. You get frustrated because of your beliefs.

Act the way you’d like to be and soon you’ll be the way you’d like to act.

Anger is not a real emotion. It is fear clothed. Figure out what you are afraid of before you get angry.

God gives his hardest battles to his toughest soldiers." You are being redirected and made strong for a purpose in your life. Its not suffering, its training. Training for you to make it big.

Eat a frog everyday(do your worst task first thing in the morning). It would be actually difficult in the beginning. But as you do it, you will start feeling better and procrastinate less in life.  

And in the end, it’s not the years in your life that count. It’s the life in your years.


Install and use MongoDB in Windows

- No comments
In this post I will share you how to install and use MongoDB in Windows in easy steps.

Step 1 : Download  MongoDB

Go to  MongoDB's official site and select the suitable version for your system and download.
Here is the link to download : https://www.mongodb.com/download-center?jmp=nav#community


Step 2 : Install it

To install  MongoDB go to download location on your computer, double click the file and press Run when pop-up appears.

Step 3 : Add  MongoDB to System Path Variable

Go to control panel then “Edit the system environment variables". when “System Properties” window appears, click on “Environment Variables…” and click on "New.." which appears in the bottom.

 Give Variable name as "Path" and Variable value  as "C:\Program Files\MongoDB\Server\3.4\bin" (navigate to MongoDB's bin folder to get the right path based on your system and folder location). Variable value depends on where you  MongoDB script folder resides.


Step 4 : Run MongoDB server
Open a command prompt window and run the "mongod" command, this command run the "MongoDB" server at "27017" port and ready to connection with a client.


Step 5 : Run MongoDB  client
Open another command prompt window and run the "mongo" command, this command create a client and establish the connection to server running at port "27017".


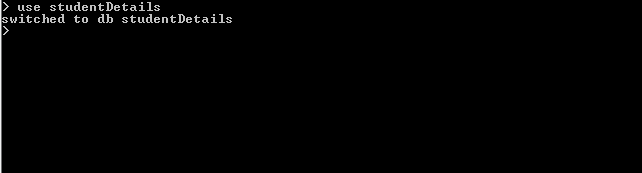
Step 6 : Create a new database
use studentDetails


Step 7 : Insert Data into database
db.students.insert([{"studentName":"Ankur","marks":"20"},
                                {"studentName":"Raj","marks":"30"}])


Step 7 : Check inserted Data into database
db.students.find().pretty();

I think today you learnt enough about mongoDB, Now go and give a try.

Happy Learning :-)


Saturday, 10 June 2017

Javascript interview questions: typeof

- 2 comments
Question : what is typeof in javascript
Answer : The typeof operator returns a string indicating the type of the unevaluated operand.
Example : var a = 1;
               console.log(typeof a);// number

Question : Write the output
                console.log(typeof Infinity);
Answer : number

Question : Write the output
                 console.log(typeof null);
 Answer : 'object';

Question : Write the output
                 var a = [1 ,2 ,3];
                 console.log(typeof a);
 Answer : 'object';

Question : Write the output
                 console.log(typeof String('abc'));
 Answer : 'string';

Question : Write the output
                 console.log(new String('abc'));
 Answer : 'object';

Question : Write the output
                 typeof g;
 Answer : "undefined";

Question : Write the output
                 console.log(typeof NaN );
 Answer : "number";
* In ES6 use Number.isNaN() function for checking the value. Otherwise you can also use isNaN() .


Javascript interview questions: Hoisting , delete , use strict

- 1 comment
Question Hoisting in Javascript.
Answer: Hoisting is JavaScript's default behavior of moving declarations to the top.

Question: Write the output
              x = 5;
             console.log(x);
             var x;
Answer: 5;

Question: Write the output
           var x;          
           x = 5;
          console.log(x);    
Answer: 5;

Question: Write the output
         "use strict";
         console.log(x);    
         var x;          
         x = 5;
Answer: undefined;

Question: Write the output
         "use strict";
         console.log(x);
          var x = 5;
Answer: undefined;

Question: Write the output
           "use strict";
           console.log(x);
            x = 5;
Answer: Uncaught ReferenceError: x is not define;

Question.  "use strict" in Javascript.
Answer: The purpose of "use strict" is to indicate that the code should be executed in "strict mode".
Syntax : "use strict";

Question: Write the output
       "use strict";
         x = 5;
         console.log(x);
Answer: ReferenceError: x is not defined

Question: Write the output
          x = 5;
          console.log(x);
 Answer: 5
* x will be create as a global varible

Question: Write the output
          "use strict";
          console.log(x);
           x = 5;
Answer: ReferenceError: x is not define;

Question: Write the output
          "use strict";
         var x = y = 2;
Answer: ReferenceError: y is not defined;

Question.  delete in Javascript.
Answer: it will delete object properties.The delete operator will not delete ordinary variables.However, it will delete "global variables," since they are actually properties of the global object.if in strict mode it will throw an error.


Question: Write the output
          "use strict";
           var x = 2;
           delete x;
           console.log(x);
Answer: SyntaxError: Delete of an unqualified identifier in strict mode.

Question: Write the output
            var x = 2;
            delete x;
             console.log(x);
Answer: 2

Question: Write the output
             x = 2;
           delete x;
           console.log(x);
Answer: undefined

Question: Write the output
            var t = "test";
           var test2.t2 = t;
           delete test2.t2;
           console.log(t);
Answer :  "test";


Saturday, 25 March 2017

Classes in JavaScript

- No comments
Classes are the well-known concept in object oriented programming. Programmer those working on C++, Java etc are aware of what is Class and what we can achieve using Classes.With ECMAScript 2015 version JavaScript also introduced Classes.

According to MDN -

"JavaScript classes introduced in ECMAScript 2015 are syntactical sugar over JavaScript's existing prototype-based inheritance. The class syntax is not introducing a new object-oriented inheritance model to JavaScript. JavaScript classes provide a much simpler and clearer syntax to create objects and deal with inheritance."

let's go bit deeper and learn how Classes works in JavaScript.
  • JavaScript classes introduced in ECMAScript 2015.
  • To declare a class, you use the class keyword with the name of the class.
  • JavaScript does not have classes, the way that Java and other languages have classes.
  • JavaScript's class is (mostly) just syntactical sugar for prototypes, which are very different from traditional classes.
  • A distinctive feature of classes is the function called the constructor. This is where you initialize your object's properties.
  • You don't have to define a constructor function. If you choose not to, the engine will insert an empty one for you.
  • In JavaScript, there is two way to define the class.


Class declarations: Use the class keyword and give class name.


     class Rectangle{

         constructor(height, width) {

         this.height = height;

         this.width = width;

       }

    }


Class expressions: class expression can be named or unnamed in JavaScript.


     // unnamed

     var Rectangle = class {

     constructor(height, width) {

      this.height = height;

      this.width = width;

    }

  };


      // named

     var Rectangle = class Rectangle {

     constructor(height, width) {

     this.height = height;

     this.width = width;

    }

   };


An important difference between function declarations and class declarations is that function declarations are hoisted and class declarations are not.


    //Example

    var p = new Rectangle(); // ReferenceError

    class Rectangle {}


The constructor method is a special method for creating and initializing an object created with a class. A constructor can use the super keyword to call the constructor of a parent class.

Prototype methods: 

Here is the example to create prototype method in JavaScript


      class Rectangle {

         constructor(height, width) {

         this.height = height;

         this.width = width;

      }

       get area() {
          return this.calcArea();
       }

      calcArea() {
        return this.height * this.width;
     }
   }
    const square = new Rectangle(10, 10);
    console.log(square.area);


Static methods: 

  • The static keyword defines a static method for a class.
  • Static methods are called without instantiating their class and cannot be called through a class instance. 
  • Static methods are often used to create utility functions for an application.Below is the example to create static method in JavaScript.


      class Point {
          constructor(x, y) {
          this.x = x;
          this.y = y;
       }

        static distance(a, b) {
        const dx = a.x - b.x;
        const dy = a.y - b.y;

        return Math.sqrt(dx*dx + dy*dy);
      }
    }

        const p1 = new Point(5, 5);
        const p2 = new Point(10, 10);
        console.log(Point.distance(p1, p2));


ES6 is finalized, but not fully supported by all browsers (e.g., ES6 Firefox support). To use ES6 today, get a compiler like Babel.For more information and examples on ES6 classes, take a look at this link MDN:CLASSES.

Happy Learning :-)


Sunday, 19 March 2017

JavaScript ES6 : Difference between var, let and const

- No comments

   In this tutorial I am going to write about variable declaration in JavaScript.So lets start with some basic difference between var, let and const.

var 
  • var is scoped to the nearest function block.
  • You can declare the same variable multiple times using var.
  • You can use variable before even initialize. 
  • Global variables defined with var will be added as properties on the global window object.


    //Example

    function test(){

        for( var i = 0; i < 5; i++ ) {

            //i is visible here
        }

         //i is visible here
     }
     //i is not visible here


   // You can declare the same variable multiple times using var.

    'use strict';
    var a;
    var a;

   //You can use variable before even initialize.

   function fun () {
   typeof a;
   var a = 'big';
   }
   fun();

   /*Global variables defined with var will be added as properties
   on the global window object*/
   
   var  a = 'go';  // globally scoped
   console.log(window.a); // 'go'


let
  • let is scoped to the nearest enclosing block (both are global if outside any block), which can be smaller than a function block.
  • let says variable will be used only in the block it’s defined in.
  • The use case for `let` tends to be for loops or mathematical algorithms.
  • Use let where you  need to reassign a variable like in loops.
  • Assuming strict mode,you can't declare the same variable multiple times using let.
  • Always initialize your identifiers before you try to use them.
  • Global variables defined with let will not be added as properties on the global window object
for( let i = 0; i < 5; i++ ) { //i is only visible in here //and there is a separate i variable for each iteration of the loop } //i is not visible here // You can't declare the same variable multiple times using let. 'use strict'; let a; let a; // SyntaxError: Identifier 'b' has already been declared //always initialize your identifiers before you try to use them function fun () { typeof a; let a = 'big'; } fun(); // Uncaught ReferenceError: bar is not defined /*Global variables defined with let will not be added as properties on the global window object*/ let a = 'go'; // globally scoped console.log(window.a); // undefined
const
  • Constants are block-scoped
  • The value of a constant cannot change through re-assignment, and it can't be redeclared.
  • const says the identifier won’t be reassigned.
  • Naming convention for const variable  is to use all-uppercase letters.
   //Example
   // define MY_NUM as a constant and give it the value 17
   const MY_NUM = 17;

   // this will throw an error
   MY_NUM = 20;

   // will print 17
   console.log('my number is: ' + MY_NUM);

   // trying to redeclare a constant throws an error
   const MY_NUM = 20;

   // the name MY_NUM is reserved for constant above, so this will also fail
   var MY_NUM = 20;

   // this throws an error also
   let MY_NUM = 20;

I feel you found this article useful and now you got a clear picture about where and how to  use var, let and const more effectively.

Happy Learning :-)

Saturday, 18 March 2017

JavaScript : Data types and operation between data.

- No comments
     

              JavaScript is the language, which is becoming the universal programming language for the web and currently, it is not only popular for front-end but back-end as well.

When starting with JavaScript people generally get confused with JavaScript data types.In this tutorial, I am going to share how JavaScript data type works.

These are the few key points to mention

  • JavaScript is a loosely typed or a dynamic language.
  • You don't have to declare the type of a variable ahead of time, it will get determined automatically while the program is being processed.
Data types

The latest ECMAScript standard defines seven data types: 
Six data types that are primitives, primitives are immutable values (values, which are incapable of being changed): 
  • Boolean
  •  Null
  •  Undefined
  •  Number
  •  String 
  • Symbol (new in ECMAScript 6) 
and Object

See the example

Var test  =  "Mark"; // test is a String
Var test  =  123; // test is a Number
Var test  =  true; // test is a Boolean

        Here you can see, I reassigned variable with different type and based on the given value JavaScript will dynamically identify what will the type of the data.Until this stage, everything is perfectly fine but you start getting into the trouble when JavaScript decides the type of the variable based on how that variable is used.

Let see the example:

        '43' - 3  // 40
3 - '43' //-40
'4' - '6'//-2
'er' - 6 // NaN
6 - 'er' // NaN
53 + 'y'// "53y"
'y' + 53 // "y53"
'4' + '6'// "46"
'43' + 3 // "433"
3 + '43' // "343"
3 + 43 // 46
'6' * 3 // 18
'6' * 'b' //NaN
6 * 'b' //NaN

One way to fix this problem is to be explicit about the variables.check the example


   // previous code

   '43' + 3 // "433"

   // explicit

   var num = "43";

   console.log(parseInt(num, 10) + 3); // 46


In this example, I am using parseInt which is saying to the JS, whatever in the num variable parse that as the integer before performing any operation.This is the one way to get rid of such kind of problem where JavaScript dynamically decides type of data.

Now I feel you understood some basics of the concept, so it's time to give it try.To find more you can check here.
 JavaScript data types and data structures

Happy Learning :-)


Sunday, 13 November 2016

How to create transparent overlay on background image

- No comments
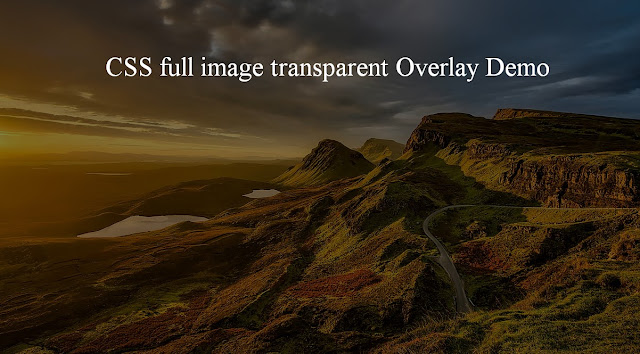
image overlay example
 
        Full-screen image based homepage is the very popular design concept and it is adapted by many websites. Whenever web designer adds the full-screen image on the landing page, a requirement to add text or other contents, over it comes into the picture. But directly adding the text on the image is not a good idea and this makes user experience bad.

This is where adding overlay on the image comes. If you want to add content on the image first create overlay than put content on top of it. Here I gave one example, there is much more use case where you can use an overlay for better user experience.

See here what I am talking about View demo

In this post, I am going to share you how you can use CSS to create overlay on the image.

Let’s go step by step

STEP 1: First I am going to create HTML file and basic HTML structure where I will be writing my code.

<!DOCTYPE html>
 <html>
  <head>
         <title>Overlay demo</title>
  </head>
  <body>
   <!-- add your code here -->
  </body>
 </html>

STEP 2: Next I will reset default CSS. So look into given code how you can do same.

body, html {
    margin: 0;
    padding: 0;
    border:0;
    height: 100%;
    font: inherit;
    vertical-align: baseline;
}

STEP 3:  Create an outer div with the background image and make 100% so it can occupy full screen of the browser window.

<div id = "main-img"></div>

#main-img{
 background-image: url("images/back.jpg");
 background-size: cover;
 background-position: center center;
 position: relative;
 height: 100%;
 width: 100%;
 top:0;
 bottom: 0;
}

STEP 4: Create another div inside the outer div and make it position absolute. Add the CSS given below for inner div.

<div id = "main-img">
 <div id = "img-overlay"></div>
</div>

#img-overlay{
 position: absolute;
 height: 100%;
 width: 100%;
 top:0;
 bottom: 0;
 background-color: rgba(0,0,0,0.5);
}


STEP 5: Create content tags as many you want and position them based on your requirement. Here I am using  <div> to add text on the image.

<div id = "main-img">
 <div id = "img-overlay"></div>
 <div class = "img-text">CSS full image transparent Overlay Demo</div>
</div>

.img-text{
    color: white;
    font-size: 50px;
    text-align: center;
    width: 100%;
    position: absolute;
    margin: 100px auto;
}

You can see the demo and get complete code here.
Source Code

Congratulations, you learnt something new. Now it’s time to go and try on your project.

Happy learning :-)

Saturday, 29 October 2016

Image preloading using javascript

- No comments


Image preloading is the concept comes in a consideration for websites those are image-heavy or in simple term, having lots of images like photo gallery or image based catalog. For image based catalog when the browser tries to download image sometimes sluggish behavior can occur because of slow connection or low bandwidth.

Image preloading can solve this problem by downloading the images before the viewer has requested them and images will be cached and instantly available when they are needed.Let’s see how you can do Image preloading for your application using javascript.

HOW TO IMPLEMENT PRELOADING :

1) Create array of images or array of objects containing image metadata.
2) Loops through an array or array of objects.
3) Creates a new HTML Image object for each one, and assigns a URL to its src attribute.
4) As soon as each image object is assigned a src value, the browser will fire off a request to the server and cache the image when it is returned.

As per steps given above this will be the code snippet to preload images

for (var i = 0; i<images.length; ++i) {
      var img = new Image();       
      img.src = images[‘url’];
}

Example:

function preload(images) {
    if (document.images) {
        var i = 0;
        var imageArray = new Array();
        imageArray = images.split(',');
        var imageObj = new Image();
        for (i = 0; i < = imageArray.length - 1; i++) {
            imageObj.src = imageArray[i];
        }
    }
}

preload('img1.jpg,img2.jpg,img3.jpg');

Here img1.jpg, img2.jpg and img3.jpg are images which I want to preload . you can replace these with your image file name. You can have as many files as you want.

One drawback of this method is that the browser will try to download as many images as it can at the same time because code will loop through and request every image almost instantly without waiting to hear back from the server.

THE BETTER WAY:

If you understand the behaviour of your viewers this will be very useful. If you know in catalogue user is seeing items sequentially you can load the images in that same sequence. In that case, you only need the one the viewer wants to see right now. With the sequential download, this image has the full bandwidth to itself and will be ready faster than parallel downloading.

Let’s see the steps:

1) Takes the first image in the array (at index 0), attaches an onload handler, and then requests the image.
2) Only after this image has finished loading does it call the onload handler which then does the same thing for the next image. This continues until all images are loaded.

function preload(imageArray, index) {
    index = index || 0;
    if (imageArray && imageArray.length > index) {
        var img = new Image();
        img.onload = function() {
            preload(imageArray, index + 1);
        }
        img.src = images[index][‘url’];
    }
    /* images is an array with image metadata */
    preload(images);

 NOTE : AVOID PRELOADING TOO SOON.

Satisfying image loading requests while it is also downloading critical page elements are not good, the best practice is to start preloading after the whole content is loaded. You can use this code snippet to achieve this.

JQUERY:

<script>
    $(window).load(function() {
        /* Preload code goes here */
    });
</script>

JAVASCRIPT:

<script>
    function load() {
        /* Preload code goes here */
    }
    window.onload = load;
</script>

The result is that all the navigation, thumbnails, and the single main image are loaded as quickly as possible first before we deal with preloading.

Saturday, 8 October 2016

Disable cut(CTRL+X), copy(CTRL+C), paste(CTRL+V) and mouse right click in web page

- 2 comments
In this article, I am going to share you how you can disable right-click and cut/copy/paste keyboard option using JavaScript and HTML on your web page.

Before starting anything I am going to give you brief insight about the usage of  disabling right-click and cut/copy option on the web page. So these are few cases.

1. Prevent user to view the source code.
2. Prevent user to copy content.
3. Prevent user to save images or any assets from the web page.

These are the methods you can use to achieve it.

METHOD 1 :  Disable right click and cut, copy, paste using HTML.

Set the oncontextmenu, oncopy, oncut, onpaste to return false in body tag. Your code will be look like this :

<body oncontextmenu = "return false" oncopy="return false" oncut="return false" onpaste="return false">

METHOD 2 :  Disable right click and cut, copy, paste using JavaScript.

To disable right click using JavaScript you can bind function that performs the check for the given input on mouse down Event. Similarly, you can use oncopy, oncut and onpaste event and bind the function to it.
Here is the code snippet :

<script type="text/javascript">

//Disable cut copy paste
document.oncopy = function(){alert("copy option disabled"); return false;}
document.oncut = function(){alert("cut option disabled");return false;}
document.onpaste = function(){alert("paste option disabled");return false;}

//Disable mouse right click
document.onmousedown = disableclick;
msg = "Right Click Disabled";
function disableclick(e)
{
     if(event.button==2)
     {
     alert(msg);
     return false;
   }
}
</script>

METHOD 3 : Disable right click and cut, copy, paste using Jquery.

To do same with  jQuery first you should download jquery file and attach to your html file as given below:
<script src="jquery.min.js"></script>

Next write your Jquery code as given below:

<script type="text/javascript">
$(document).ready(function () {

    //Disable mouse right click
    $("body").on("contextmenu",function(e){
        return false;
    });

    //Disable cut copy paste
    $('body').bind('cut copy paste', function (e) {
        e.preventDefault();
    });

});
</script>

Disabling right-click and cut/copy/paste option will not give you the guarantee to secure your data from any action but it will make things difficult for the novice.


Sunday, 2 October 2016

Create Loading icon using CSS

- No comments
      "Loading icon" or "Loader" are frequently used in web applications to show, the complex process is running behind the screen. Mostly, GIF images are used to create loader but they can be heavy and take the time to load in the browser.So one of the best alternative  to avoid heavy GIF is using CSS to create loader.

 In this post, I  will show you  how to create the loader for your application using CSS. Let us start step by step

STEP 1: Add loader div inside <body> tag
       
            <!DOCTYPE html>
            <html>
                     <head></head>
                    <body>
                                  <div class="loader"></div>
                                 <div class = "loadText">Loading..</div>
                    </body>
           </html>

STEP 2: Add given CSS inside <style> tag or in CSS file where you are managing your CSS.

.loader {
  margin: 50px;
  border: 5px solid #ebeef0;
  border-radius: 50%;
  border-top: 5px solid #0BDAA1;
  width: 100px;
  height: 100px;
  -webkit-animation: spin 1s linear infinite;
  animation: spin 1s linear infinite;
}

@-webkit-keyframes spin {
  0% { -webkit-transform: rotate(0deg); }
  100% { -webkit-transform: rotate(360deg); }
}

@keyframes spin {
  0% { transform: rotate(0deg); }
  100% { transform: rotate(360deg); }
}

.loadText{
  font-size: 20px;
  margin-left: 70px;
  color: blue;
}

STEP 3: Save and load this in browser
       
Here is the output you will get into your browser.

Now understand what CSS is doing in this code.

Circle for loader is created using "border-radius : 50%"  and Green color loading part is created using "border-top: 5px solid #0BDAA1;" where 5px is border size.remaining loading part is created using  "border: 5px solid #ebeef0;" .

Next is animation, which is responsible for spinning the loader with 1-second animation speed for forever and  "@keyframes spin" defines the rule for the loader.

To experiment with the loader you can give border-left,border-right, border-bottom and border-top altogether or with any combination.

Click here to see working example.
View Demo

I hope you learned something and enjoyed the post.


Thursday, 29 September 2016

Setup a simple server using Python

- No comments
Today I will share you how to setup server quickly using Python in Windows in 5 easy steps.

Step 1 : Download python

Go to Python's official site and select the suitable version for your system and download.
Here is the link to download : https://www.python.org/downloads/

          
Step 2 : Install it

To install Python go to download location on your computer, double click the file and press Run when pop-up appears.

If you have multiple accounts on your computer and you don’t want to install it for all, select the “Install just for me” option then press "Next". move forward and finish the installation process.

Step 3 : Add Python to System Path Variable

Go to control panel then “Edit the system environment variables". when “System Properties” window appears, click on “Environment Variables…” and click on "New.." which appears in the bottom.


Give Variable name as "Path" and Variable value  as "c:\python27;c:\python27\script" . Variable value depends on where you Python script folder resides.


Step 4 : Run server

Go to your project directory and run given command.

#  for Python 2
python -m SimpleHTTPServer <portNo>

# for Python 3
python -m http.server <portNo>
or
python -m http.server

ex.
python -m http.server

For example, I run Python3.3 and the command I use is python -m http.server


Step 5 : Run URL in browser

 At last, go to your favorite browser.
 Paste the given URL in address bar  " http://localhost:8000/index.html "  and enter now, you can debug  your application in browser.